Wednesday, August 22, 2012

Rosette hair and the arcade

Hi lovelies!

I had a date yesterday with my darling boyfriend and we went to the arcade to play skee-ball (my favorite!) and got pinkberry and bubble tea! It was a really sweet date, and I took a couple pictures for you guys, and then I have a really easy hair tutorial for you to try out!  It is the perfect look for a date that you want your hair out of your face for, or if you just want to look cute for work/school!

The boyfriend was trying to play pinball...but there was a child that was just watching us...


We won a bunch of tickets!
Now on to the hair! All you need are, as usual, a comb/brush, and some bobby pins, and if you like a head band!

Comb out your hair, pulling it straight back from your face. Then you are going to take pieces of hair from by your face and twist it around two fingers until tight with the back or your head. Pin the curl down flat with as many bobby pins as you need Make three of these curls, alternating what side of your head you are taking hair from, and pin them closely together.

You could stop now and leave your hair as-is. Or you could add a cute headband, ribbon, or clip to add a little more pizzazz to your hair! 

The front view of the look

The back view of my hair

The side view


The rosettes that I placed in the back could be placed anywhere else you like to achieve different looks! Another thing to note is that if you sleep with them in you will have little ringlets for a second day look! (If you want the ringlets I would suggest doing a whole bunch to curl your hair with 0 heat)

If you need anything clarified, try it out on yourself, or have any comments I would love to hear them!

<3

Sunday, August 19, 2012

Update on the terrarium!

Hello lovelies!

I made a terrarium about a week ago...then I made two more to go with it!  I just thought that I would show you all the terrariums that I made and see what you thought!
All three of them together on top of my dresser


<3

Salmon Cakes and a Braid Bun for Date Night

Hello my lovelies!

I recently had a date night with my boyfriend of 4 1/2 years that I made dinner for. I made Salmon Cakes and a mixed green salad with balsamic vinaigrette. Because of this date night I have a hair style for you that is cute, but gets your hair out of your way for cooking dinner. 

My adorable boyfriend being a dork...
I made him take a normal picture...
I got the recipe for the salmon cakes from Cooks Illustrated magazine a while ago and made them for his birthday about a year ago. He really liked them so I decided it only made sense to make them again! 


The salad was super simple with a mix of greens and diced carrot and bell pepper with olive oil and balsamic vinegar. Then just tossed.


(I made him a sandwich the next day with the salmon cake and made a spicy mayo that he really seemed to like!)


Next thing is the hair! Really simple, really cute. You really need a hair tie, and a comb/brush, and a couple bobby pins or a hair clip.

As per usual, brush out your hair. Then separate out the top of your hair and pull it straight back and pin to your head. 

Take the rest of your hair and braid it straight down in either a normal or reverse braid.  Once braided all the way down, take the braid and roll it up and tie into a bun when it is tight to your head.  


Ta-da! You are done! 

Let me know if you have any questions, comments, or try it on yourself let me know!

<3

Wednesday, August 8, 2012

Feeling crafty: terrariums

Hello my lovelies!

I was feeling rather crafty this afternoon and felt that making a terrarium seemed like a really fantastic idea! I have never made one before, so this was a first attempt, but not too bad of one...at least I do not think so.

Once I decided to do this, I got together all of the materials.


So I got a glass container that I got at Hobby Lobby, some shells and sand from the beach, small plants, activated charcoal, and Spanish moss from my local garden center.


There are a couple simple steps, first, place some of the rocks and shells in the bottom of your glass container.


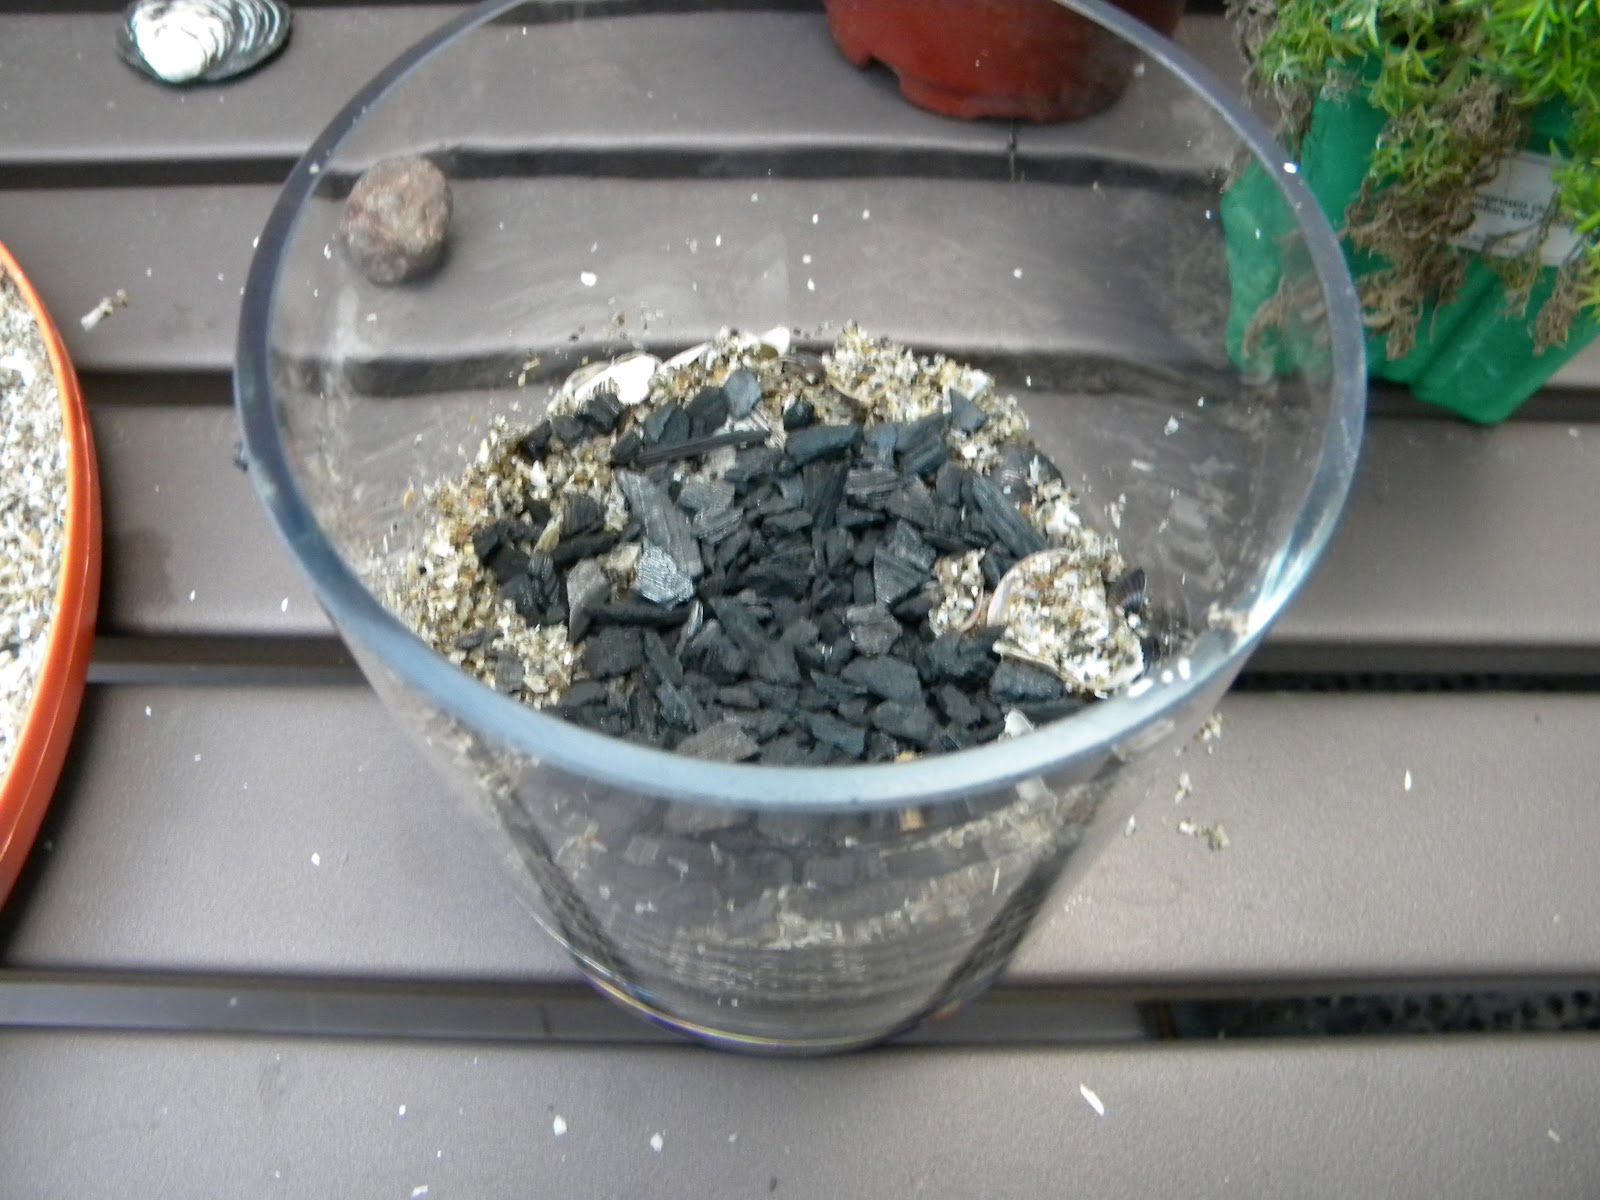
Then you are going to put the activated charcoal on top of this to help reduce the odor that could occur.


I forgot to take a picture, but you are going to place Spanish moss on top of this to keep the dirt from migrating into the bottom layer over time. Then put dirt on top of the moss and add your plants. I chose large plants, so it won't be an enclosed terrarium, but I think it is still cute! I used some chamomile and surrounded the plant with moss from the garden. I am thinking that I am going to get two more containers for my other plants that will be an interesting contrast and make it into a set.


I think these are really cute for an organic table centerpiece, or just a conversation starter to have around your house. And unlike cut flowers, it is alive and will last for a long time!

Let me know if you try this or have questions or comments!

<3


Pumpkin Bread with Candied Ginger and Walnuts

I was browsing through the newest issue of Cooks Illustrated and found a great recipe for pumpkin bread. (Baking is just the TINIEST of addictions... <.< >.> <.<)


Anyway, the pumpkin bread is INCREDIBLE! It has cream cheese and walnuts and candied ginger (which I have recently fallen in love with!) and it is SUPER moist!

If you want the recipe for it you could try the website: http://www.cooksillustrated.com/recipes/login.asp?docid=37161

I think you should try it, it is SO good!


The recipe makes two loaves, and has a crumbly topping that is mostly brown sugar, butter, and ginger and cinnamon. Super good and really popular in my house! 

<3

A Summer Baby Shower and French Twist Ponytail


Well hello my lovelies!

I recently went to my friends baby shower for a baby boy that is due in September. The mommy- and daddy-to-be are naming him Asher, and they have an adorable nursery with an exotic animal theme. There are monkeys and lions and giraffes and elephants and hippos everywhere! 

Anyway, I took a couple of pictures of her opening gifts at the baby shower, and one of our other friends is taking notes on what is from whom for writing thank you notes later. So I will give you a couple pictures of that before I give you the hair style that I created to keep cool in the hall the baby shower was in.


Opening the presents!
The TINIEST shoes I have ever seen!


Little bibs that I made! (There is an apple, carrot, and corn.)
Itty bitty sunglasses!

Now on to the french twist ponytail! All you need is a comb/brush and a ponytail holder!

So, as per usual, brush (or comb) our your hair to make sure you do not run into any snarls when doing this hair style! 

Once your hair is combed out section out a chunk of hair at the top of your head and split it into two pieces. Take the two pieces and cross one over the other, then cross again to make a full twist. Add more hair into each section, and cross the hair over again, keep the hair tight. Continue adding hair as you go down, twisting the hair after each one. Once you reach the end just tie off with the ponytail holder and you are done! 

If you like you could add a cute bobby pin, ribbon around the holder or a flower pin!

The back of the hairstyle

The back again!

The hairstyle from the side
Let me know if you have any questions, comments, or let me know if you try it out on yourself!

<3 <3 <3

Tuesday, July 31, 2012

Double flip pony

Hello lovelies!


I recently did a double flip hair style that I thought I'd take a moment to share it with you! It is super simple, and appropriate for almost any occasion!

To begin with you should collect three hair ties (preferably clear elastics) and a comb (or brush) there is also an option of putting flower clips or other decorative clips into the hair style.

So, as always, comb (or brush) your hair out so it's nice and smooth.  The take your fingers and section off the top of your hair and tie it back into a loose pony tail. Take your fingers above the hair elastic and make a hole and pull the hair in the pony tail up and through that hole.

Then take a section of hair from below the first one and tie it into another low pony, incorporating the hair from the first. Then you are going to do the same thing and make a hole to flip the hair in the pony tail up and through.

Then you are going to take all the hair into the last elastic and tie it off into a tight pony tail.  At that point you are done!

...or you could embellish just a little bit more! At the last elastic you can pin in some fake flowers to the hair or some sort of other fancy pin.

...and you could also curl the hair in the pony tail ( or straighten it).

The double flipped ponytail 

<3