Showing posts with label braid. Show all posts

Monday, May 27, 2013

Another way to wear the 5 strand textured brad pull back

Hello lovelies!

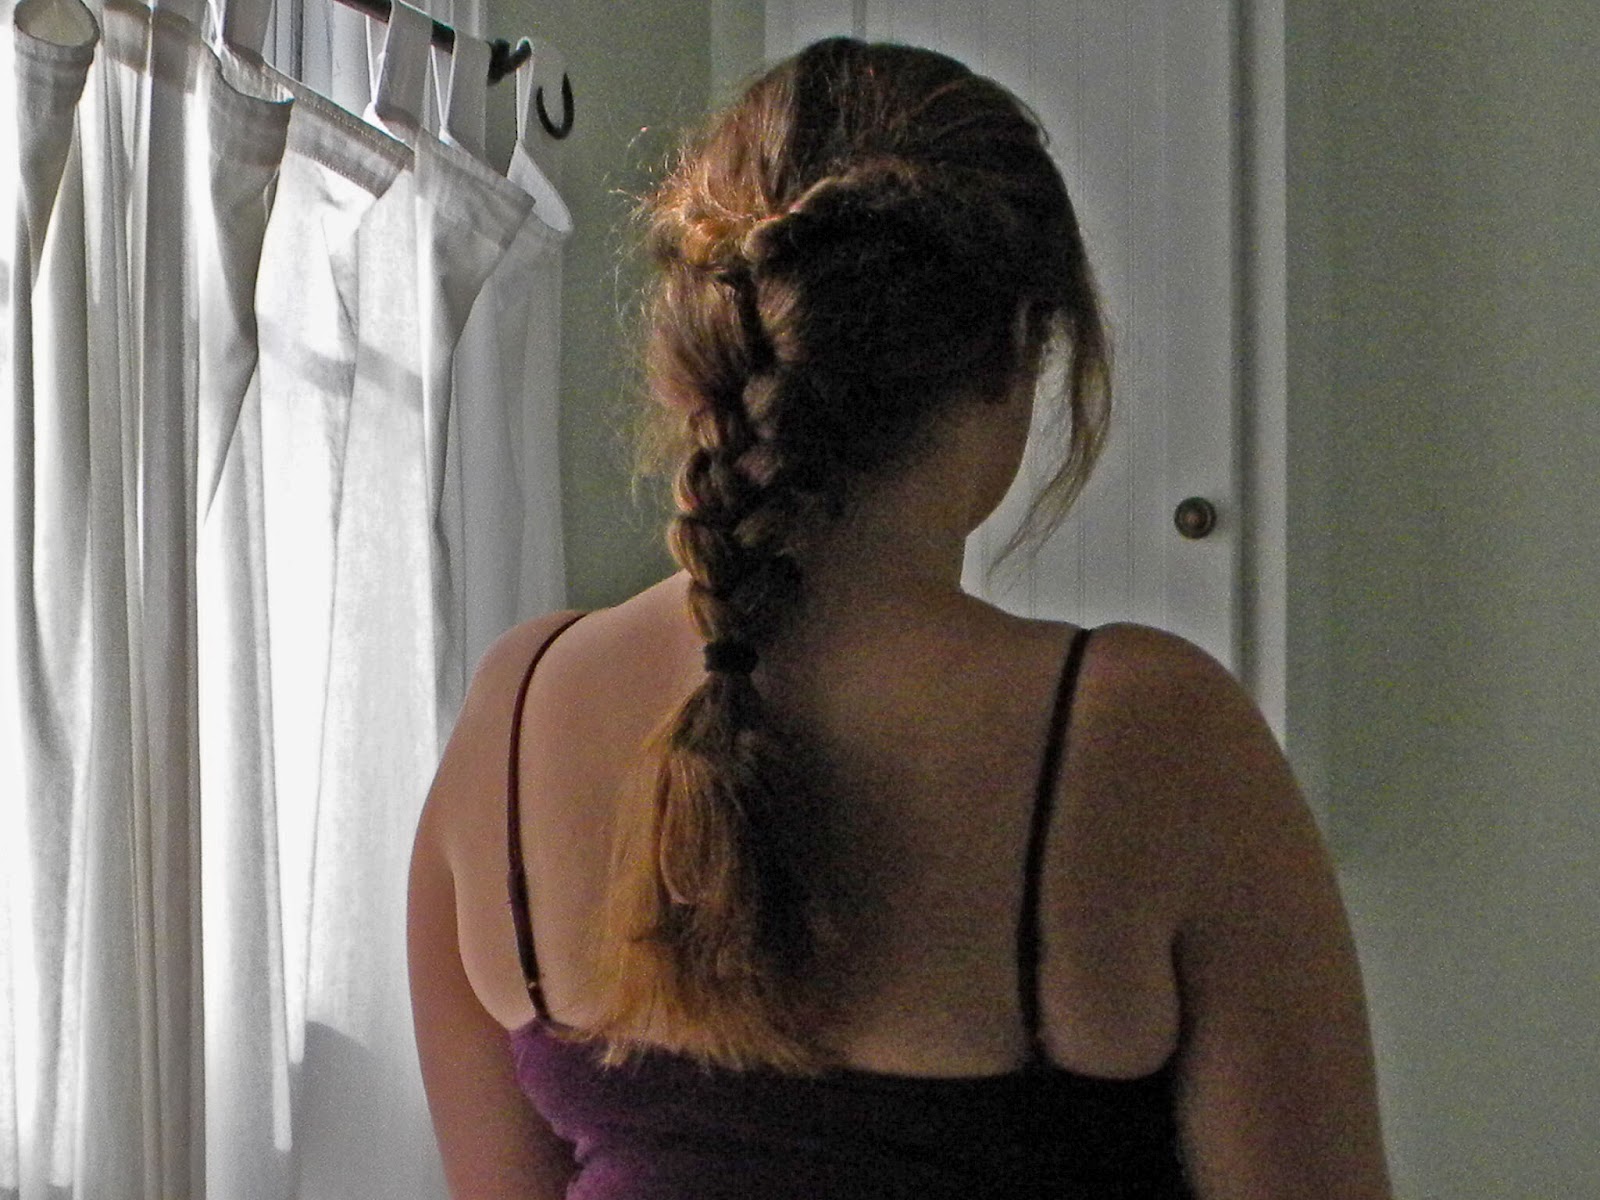
The 5-strand wavey braid that I showed you yesterday can be re-vamped in a different way! All you have to do is follow the same procedure as yesterday, but instead of just leaving it at that, you can do a loose braid to the side to get it all out of the way or just pull it into a different look!


Hope you liked this hairstyle, please feel free to contact me with questions, comments, requests, or if you just try it yourself!


<3 <3 <3

5-strand textured braid pull-back!

Hello again, my lovelies! 

Long time, no see! I am very sorry for how long it has been since I have posted, school took over my life for the majority of the year, but I am now free for the summer! No studying for this girl (until the fall that is...)!

Anyway, the hairstyle I have chosen to start the summer off with is a pull back to get that hair out of your face in the heat, with STYLE! 

You will need a comb, a clip or some bobby pins, and an elastic hair tie.

Part your hair to one side, and on the side with the most hair take a chunk from the front, tie the rest back for now. Comb it out to get the tangles out, and then separate the hair into 5 pieces (3 small and 2 large). I recommend the small pieces to be the middle and end pieces. 

Side part in my hair
Once you have your pieces, start braiding down the length of the strands. Start from the outside piece on the right and cross it over the next piece and under the next. Then start at the left side and cross it over the next piece and under the middle piece. Continue down the strand till there is only an inch or so left. (When braiding 5-strand braids I like to say over, under, over , under, over, under, over, under, etc.  to keep track of the strands I am on) Once I reach the end of the braid I tie it off with the elastic and start to tug on the outside of the large pieces of hair to soften the braid and create a textured braid that looks almost like waves.
Hair before tugging out the large sections of hair
Once I get the braid how I want it, pull it back from your face, along the side of your head, and pin with either bobby pins or a clip. For this I chose a bow that I made the other day.
My lacey blue bow

The wavey five strand braid
 I didn't exaggerate the waves as much as you can; however, I like the way it looks simple from a distance, but more complex closer up.
Close up of the braid to see the details

I hope that you enjoyed this tutorial! Please let me know if you have comments, questions, ideas on how to change it, or if you try it yourself.

<3 <3 <3


Tuesday, March 19, 2013

The 4 strand braid pull-back

It has been too long my lovelies!
Here is a quick hairstyle to spice up your hair for the day!
This is a 4-strand braid pull back.

Separate out a chunk from the front of your hair and tie the rest back from your face. Take the chunk and separate into four even pieces. Holding the pieces pulling back from your face, start to braid. The braid is taking an outside piece and going over, then under, then the other outside piece going under, then over. Keep repeating this down the strands till you run out of hair.

If that way of thinking about it doesn't work for you, the other way that I have heard it explained is taking one outside piece over, under, over, then flipping the two in the middle and repeat.

Once the strand is done you can tie it off and proceed to mix it into the style. Or, you can do what I did and hold one of the middle strands and push the rest of the braid up to make it a little messier, then tie off.

What I did once I had my braid tied off was pull it into a pony tail to fit what I had to do that day. Or you could pin it with a flower, hide the end under some other hair with pins, or pull back into a bun.

Voila! You are done and ready to head out the door!


<3

Thursday, August 23, 2012

Not your mothers pony-tail

Hello my lovelies!

I have a quick and easy way to spice up your ponytail to make it a little more put-together looking and not like you just ran out of the house!

All you need are bobby pins, a comb/brush, and a couple hair elastics. 

To begin with, comb out your hair. Then you are going to separate out pieces of hair from your temples back. Take those pieces and pin out of your way for the moment.

Take all the loose hair that you have left unpinned, and brush into a high ponytail. Unpin the front pieces and wet them down, or just comb it out. Then separate out the front of each piece and start braiding straight back towards the ponytail, only adding hair to the bottom. Keep it high to that it covers the part as well as you can. Tie off the braid when it reaches the pony with a hair elastic. Repeat on the other side.

Use the two braids you just created to wrap around the ponytail holder and pin the ends below the ponytail. 

That's it! You are now done with your hair and ready to start your day! Perfect for school, work, a casual date or a night out!

The look from behind

The look from the side

Let me know if you have questions, comments, or try this hairstyle on yourself!

<3

Wednesday, August 22, 2012

Rosette hair and the arcade

Hi lovelies!

I had a date yesterday with my darling boyfriend and we went to the arcade to play skee-ball (my favorite!) and got pinkberry and bubble tea! It was a really sweet date, and I took a couple pictures for you guys, and then I have a really easy hair tutorial for you to try out!  It is the perfect look for a date that you want your hair out of your face for, or if you just want to look cute for work/school!

The boyfriend was trying to play pinball...but there was a child that was just watching us...


We won a bunch of tickets!
Now on to the hair! All you need are, as usual, a comb/brush, and some bobby pins, and if you like a head band!

Comb out your hair, pulling it straight back from your face. Then you are going to take pieces of hair from by your face and twist it around two fingers until tight with the back or your head. Pin the curl down flat with as many bobby pins as you need Make three of these curls, alternating what side of your head you are taking hair from, and pin them closely together.

You could stop now and leave your hair as-is. Or you could add a cute headband, ribbon, or clip to add a little more pizzazz to your hair! 

The front view of the look

The back view of my hair

The side view


The rosettes that I placed in the back could be placed anywhere else you like to achieve different looks! Another thing to note is that if you sleep with them in you will have little ringlets for a second day look! (If you want the ringlets I would suggest doing a whole bunch to curl your hair with 0 heat)

If you need anything clarified, try it out on yourself, or have any comments I would love to hear them!

<3

Sunday, August 19, 2012

Salmon Cakes and a Braid Bun for Date Night

Hello my lovelies!

I recently had a date night with my boyfriend of 4 1/2 years that I made dinner for. I made Salmon Cakes and a mixed green salad with balsamic vinaigrette. Because of this date night I have a hair style for you that is cute, but gets your hair out of your way for cooking dinner. 

My adorable boyfriend being a dork...
I made him take a normal picture...
I got the recipe for the salmon cakes from Cooks Illustrated magazine a while ago and made them for his birthday about a year ago. He really liked them so I decided it only made sense to make them again! 


The salad was super simple with a mix of greens and diced carrot and bell pepper with olive oil and balsamic vinegar. Then just tossed.


(I made him a sandwich the next day with the salmon cake and made a spicy mayo that he really seemed to like!)


Next thing is the hair! Really simple, really cute. You really need a hair tie, and a comb/brush, and a couple bobby pins or a hair clip.

As per usual, brush out your hair. Then separate out the top of your hair and pull it straight back and pin to your head. 

Take the rest of your hair and braid it straight down in either a normal or reverse braid.  Once braided all the way down, take the braid and roll it up and tie into a bun when it is tight to your head.  


Ta-da! You are done! 

Let me know if you have any questions, comments, or try it on yourself let me know!

<3

Tuesday, July 24, 2012

Miranda Tate inspired hair

Hello again my lovelies! I just went to see the new Batman movie last night, and was completely amazed at how wonderful it was! For those of you that haven't seen it, I suggest it just for the huge amount of special effects that were used so well! I especially liked the hairstyles that Miranda Tate and Selina (Catwoman) had. Today's hairstyle is inspired by Miranda Tate's braid that she wore in the end of the movie. 

To achieve this look all you need is a comb and a few hair elastics.  First thing that you need to do is the same as always, and comb out your hair to remove any tangles. Once smooth you are going to take your comb and brush it all straight back from your face. If you want to go closer to the actual hairstyle from the movie you will do a deep part in the front of your hair. If you have bangs you will utilize them by using them as the only thing that is parted, otherwise part deeply and take it about two inches back and then pull the rest of your hair straight back.

However, today I just pulled it all back. Then separate out hair straight back from your temples that are about 1 inch thick and place in a hair elastic in the back of your head.  Then you are going to make a small hole right above the hair tie and flip the hair in the pony tail through the hole. Then you are going to take the hair and gather it all together, then separate into three pieces and braid down about 2/3 of the way. Tie off the hair and leave the end loose. Pull loose strands out from braid around your face to soften the look for everyday wear.

Front View

Side View

Back view

Let me know if you have any questions or comments about this hairstyle, or the one that was used in the movie!

<3

Saturday, July 21, 2012

There will be braids

Hey all!  Here's another hair style that I came up with. And knowing me, you know that there will be braids! :D


Ok, so you need a rat tail comb, small elastic hair ties, a hair tie, and bobby pins.


So, first thing first, just comb out your hair. Once it is smooth, comb it straight back and make a deep part leading from the arch of your eye brow back.  Then you are going to take a section about 3 inches back. Secure this for the moment, and pull the rest of your hair back into a high pony tail.


Then take the hair at the front and separate out a third and do a lace dutch braid all the way down. This means that you are braiding the outside pieces under and only adding hair on one side of the braid as you go. Braid this pulling it back towards the pony tail and secure when you reach the end of the hair. Separate out another third and repeat, and then do the same to the last section of hair.  
From the top
Once the front is braided you are going to separate the hair in the pony tail into fourths and braid each piece of hair all the way to the bottom. Once it is all braided you are going to do the tricky part and braid all four together in a four-stranded braid.  So, take the braid on one side and weave it under, over and under. Repeat with the next strand on the same side as the first. Keep going until the hair is at the end and secure. Then roll the hair up into a bun, and pin into place.
Hair from the back
Then you take the three front braids and braid back towards the bun that you just made. Braid all the way to the end and secure. Then wrap around the hair tie to hide it, and pin it back into place.  
Hair from the side
Voila! Elegant hair for a dinner out, date, or wedding.


Just let me know if you have any questions or need anything explained differently.


<3