Monday, May 27, 2013

Another way to wear the 5 strand textured brad pull back

Hello lovelies!

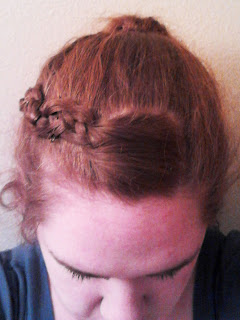
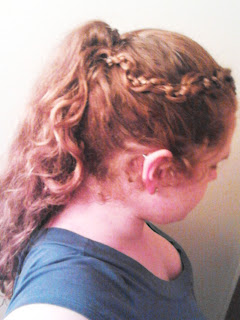
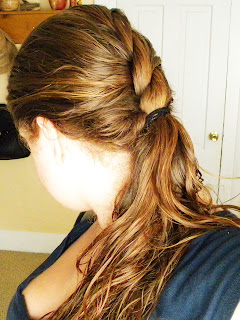
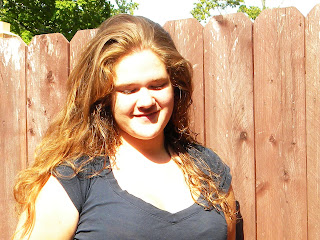
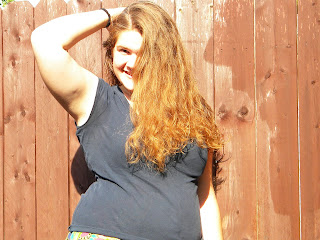
The 5-strand wavey braid that I showed you yesterday can be re-vamped in a different way! All you have to do is follow the same procedure as yesterday, but instead of just leaving it at that, you can do a loose braid to the side to get it all out of the way or just pull it into a different look!


Hope you liked this hairstyle, please feel free to contact me with questions, comments, requests, or if you just try it yourself!


<3 <3 <3

5-strand textured braid pull-back!

Hello again, my lovelies! 

Long time, no see! I am very sorry for how long it has been since I have posted, school took over my life for the majority of the year, but I am now free for the summer! No studying for this girl (until the fall that is...)!

Anyway, the hairstyle I have chosen to start the summer off with is a pull back to get that hair out of your face in the heat, with STYLE! 

You will need a comb, a clip or some bobby pins, and an elastic hair tie.

Part your hair to one side, and on the side with the most hair take a chunk from the front, tie the rest back for now. Comb it out to get the tangles out, and then separate the hair into 5 pieces (3 small and 2 large). I recommend the small pieces to be the middle and end pieces. 

Side part in my hair
Once you have your pieces, start braiding down the length of the strands. Start from the outside piece on the right and cross it over the next piece and under the next. Then start at the left side and cross it over the next piece and under the middle piece. Continue down the strand till there is only an inch or so left. (When braiding 5-strand braids I like to say over, under, over , under, over, under, over, under, etc.  to keep track of the strands I am on) Once I reach the end of the braid I tie it off with the elastic and start to tug on the outside of the large pieces of hair to soften the braid and create a textured braid that looks almost like waves.
Hair before tugging out the large sections of hair
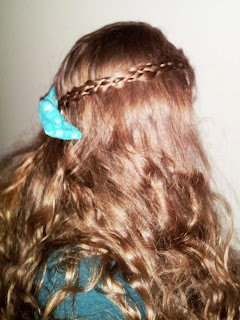
Once I get the braid how I want it, pull it back from your face, along the side of your head, and pin with either bobby pins or a clip. For this I chose a bow that I made the other day.
My lacey blue bow

The wavey five strand braid
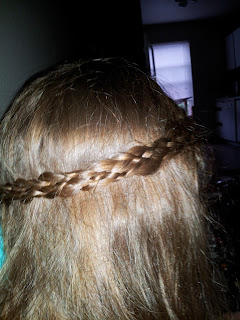
 I didn't exaggerate the waves as much as you can; however, I like the way it looks simple from a distance, but more complex closer up.
Close up of the braid to see the details

I hope that you enjoyed this tutorial! Please let me know if you have comments, questions, ideas on how to change it, or if you try it yourself.

<3 <3 <3


Tuesday, March 19, 2013

The 4 strand braid pull-back

It has been too long my lovelies!
Here is a quick hairstyle to spice up your hair for the day!
This is a 4-strand braid pull back.

Separate out a chunk from the front of your hair and tie the rest back from your face. Take the chunk and separate into four even pieces. Holding the pieces pulling back from your face, start to braid. The braid is taking an outside piece and going over, then under, then the other outside piece going under, then over. Keep repeating this down the strands till you run out of hair.

If that way of thinking about it doesn't work for you, the other way that I have heard it explained is taking one outside piece over, under, over, then flipping the two in the middle and repeat.

Once the strand is done you can tie it off and proceed to mix it into the style. Or, you can do what I did and hold one of the middle strands and push the rest of the braid up to make it a little messier, then tie off.

What I did once I had my braid tied off was pull it into a pony tail to fit what I had to do that day. Or you could pin it with a flower, hide the end under some other hair with pins, or pull back into a bun.

Voila! You are done and ready to head out the door!


<3

Tuesday, October 2, 2012

Olive Oil Hair Treatment

Hello my lovelies!

It has been much to long since I have posted, and I am very sorry. I has just been crazy with my last year of undergrad! I am going to graduate soon and have had little time to blog, but here is a post at last!

For those of you on pinterest, I am sure you have seen the olive oil/coconut oil/avocado/etc. treatments for your hair to keep it healthy and shiny. I admit to having become a fan of these treatments. I started with olive oil, there really was no special reason why this one, just that it was what I had around the house.

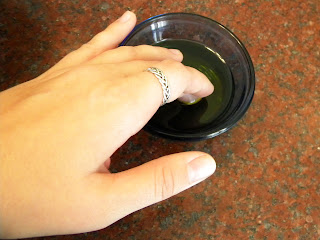
I started by pulling out some olive oil that I had in the cupboard, and pouring a small amount into a microwave safe dish.
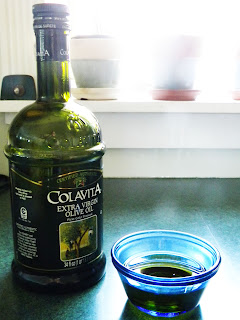

I then heated it up in the microwave until it was just past lukewarm. 


Be careful not to get it too hot!


 And then I separated my hair into chunks (do this when your hair is dry) to make sure it got evenly distributed and started working it through my hair with my fingers.

Hair separated out into sections.


After it was worked into my entire head of hair I combed it through for even distribution. A general hint is to use a towel to protect your clothing and don't wear something you really care about.
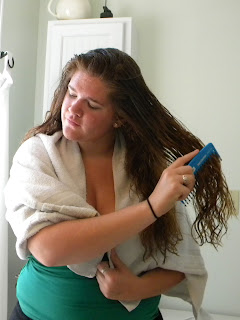
Combing, combing, combing...

Always combing!

Then wrap up your hair in the towel and let it sit for upwards of an hour. When I do this I tend to go about my chores and homework. So it tends to sit in my hair for around 2-3 hours.

Turbans are so in right now!


When you can't stand it anymore and must get the oil out, or it's just been an hour or two, take off the towel and shower. You may have to shampoo twice to get all the excess oil out, but it's so worth the time.

My really oily hair!

I just did a twisted pony-tail to keep it out of my face for a while after the shower. This is not a necessity. 


Once it's dry, enjoy your soft and shiny locks!


For those of you that have really dry or damaged hair I would consider doing this treatment once a week or so.  If you have really oily hair try this about once a month. Just do what works for you!

If you have any comments, questions, or you try this let me know!

<3

Thursday, August 23, 2012

Not your mothers pony-tail

Hello my lovelies!

I have a quick and easy way to spice up your ponytail to make it a little more put-together looking and not like you just ran out of the house!

All you need are bobby pins, a comb/brush, and a couple hair elastics. 

To begin with, comb out your hair. Then you are going to separate out pieces of hair from your temples back. Take those pieces and pin out of your way for the moment.

Take all the loose hair that you have left unpinned, and brush into a high ponytail. Unpin the front pieces and wet them down, or just comb it out. Then separate out the front of each piece and start braiding straight back towards the ponytail, only adding hair to the bottom. Keep it high to that it covers the part as well as you can. Tie off the braid when it reaches the pony with a hair elastic. Repeat on the other side.

Use the two braids you just created to wrap around the ponytail holder and pin the ends below the ponytail. 

That's it! You are now done with your hair and ready to start your day! Perfect for school, work, a casual date or a night out!

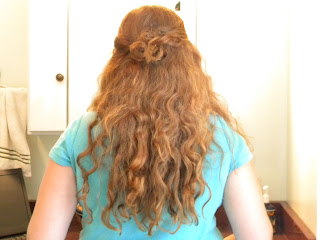
The look from behind

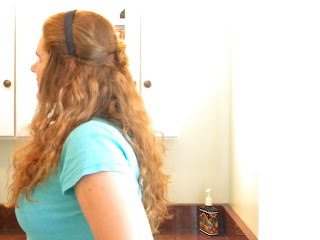
The look from the side

Let me know if you have questions, comments, or try this hairstyle on yourself!

<3

Wednesday, August 22, 2012

Rosette hair and the arcade

Hi lovelies!

I had a date yesterday with my darling boyfriend and we went to the arcade to play skee-ball (my favorite!) and got pinkberry and bubble tea! It was a really sweet date, and I took a couple pictures for you guys, and then I have a really easy hair tutorial for you to try out!  It is the perfect look for a date that you want your hair out of your face for, or if you just want to look cute for work/school!

The boyfriend was trying to play pinball...but there was a child that was just watching us...


We won a bunch of tickets!
Now on to the hair! All you need are, as usual, a comb/brush, and some bobby pins, and if you like a head band!

Comb out your hair, pulling it straight back from your face. Then you are going to take pieces of hair from by your face and twist it around two fingers until tight with the back or your head. Pin the curl down flat with as many bobby pins as you need Make three of these curls, alternating what side of your head you are taking hair from, and pin them closely together.

You could stop now and leave your hair as-is. Or you could add a cute headband, ribbon, or clip to add a little more pizzazz to your hair! 

The front view of the look

The back view of my hair

The side view


The rosettes that I placed in the back could be placed anywhere else you like to achieve different looks! Another thing to note is that if you sleep with them in you will have little ringlets for a second day look! (If you want the ringlets I would suggest doing a whole bunch to curl your hair with 0 heat)

If you need anything clarified, try it out on yourself, or have any comments I would love to hear them!

<3

Sunday, August 19, 2012

Update on the terrarium!

Hello lovelies!

I made a terrarium about a week ago...then I made two more to go with it!  I just thought that I would show you all the terrariums that I made and see what you thought!
All three of them together on top of my dresser


<3