Tuesday, July 31, 2012

Double flip pony

Hello lovelies!


I recently did a double flip hair style that I thought I'd take a moment to share it with you! It is super simple, and appropriate for almost any occasion!

To begin with you should collect three hair ties (preferably clear elastics) and a comb (or brush) there is also an option of putting flower clips or other decorative clips into the hair style.

So, as always, comb (or brush) your hair out so it's nice and smooth.  The take your fingers and section off the top of your hair and tie it back into a loose pony tail. Take your fingers above the hair elastic and make a hole and pull the hair in the pony tail up and through that hole.

Then take a section of hair from below the first one and tie it into another low pony, incorporating the hair from the first. Then you are going to do the same thing and make a hole to flip the hair in the pony tail up and through.

Then you are going to take all the hair into the last elastic and tie it off into a tight pony tail.  At that point you are done!

...or you could embellish just a little bit more! At the last elastic you can pin in some fake flowers to the hair or some sort of other fancy pin.

...and you could also curl the hair in the pony tail ( or straighten it).

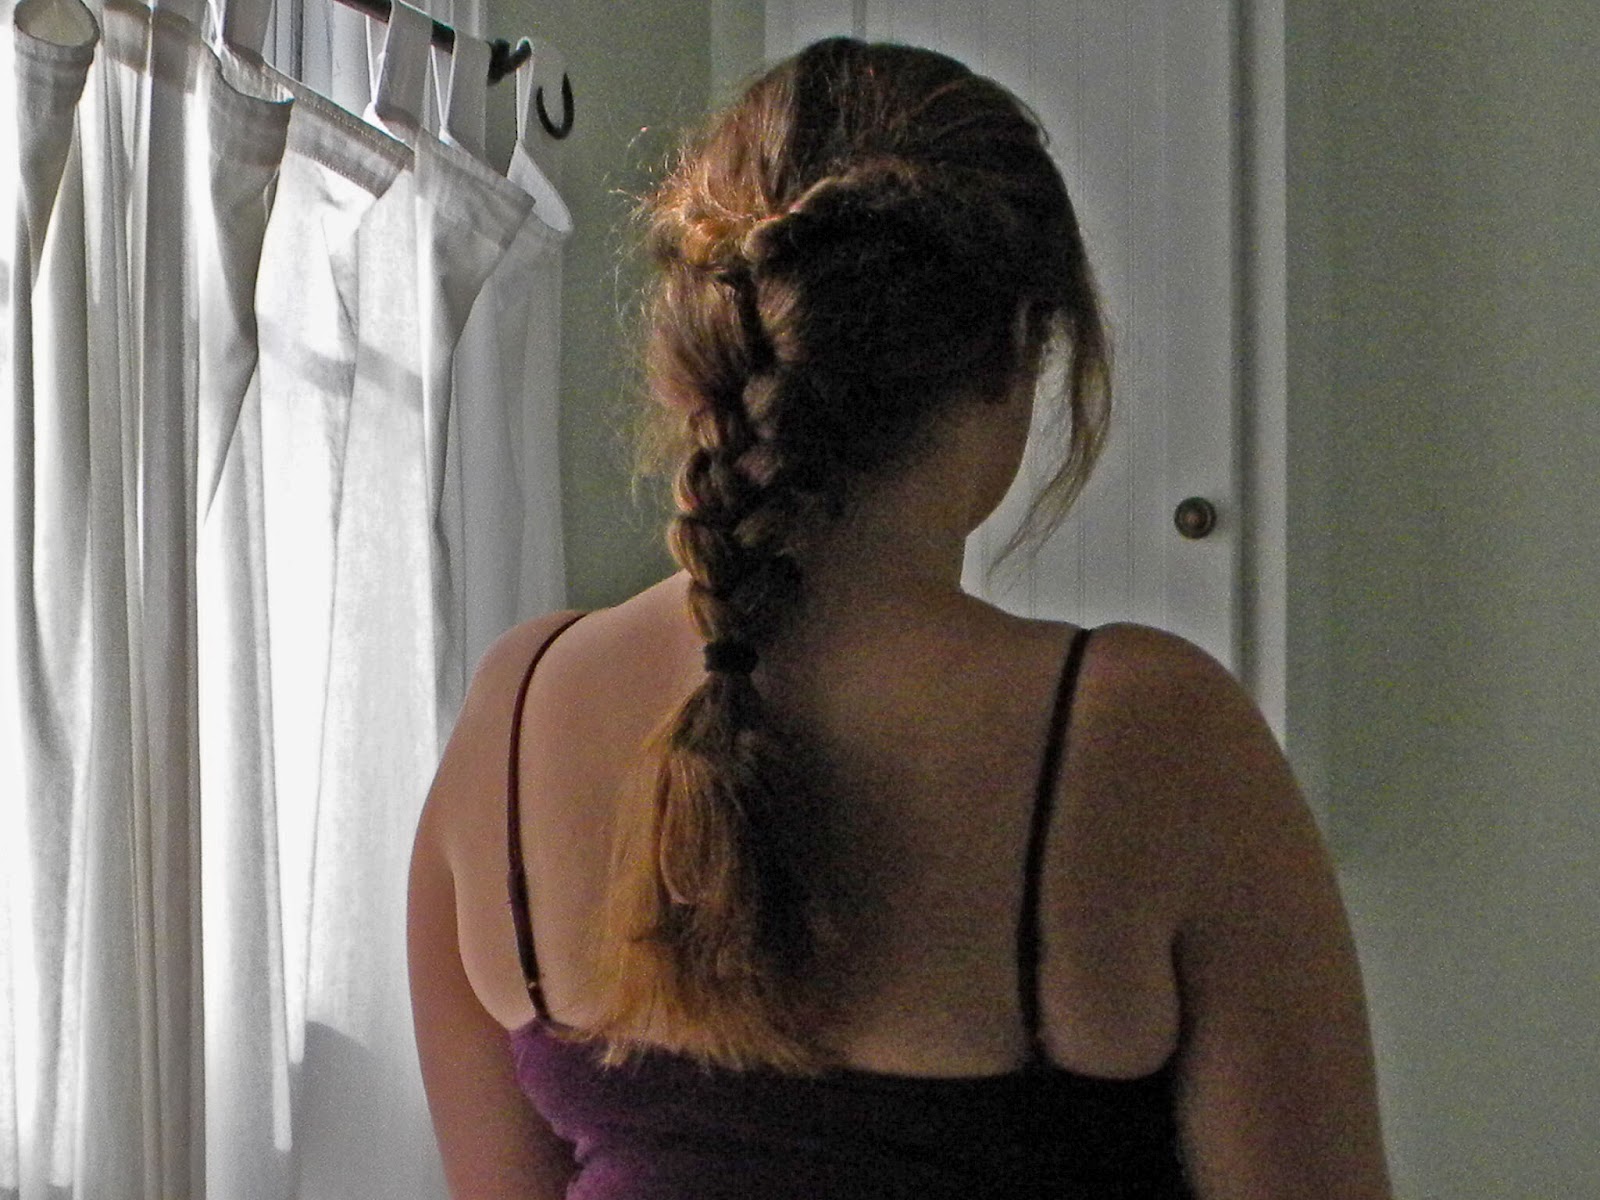
The double flipped ponytail 

<3

Key lime cupcakes

Hi darlings!


I recently made this cupcake recipe from Food Network's 'Cupcake Wars'. They are key lime cupcakes that have a lime curd filling in a lime cake and a lime cream cheese frosting. It is VERY limey. The link for it on the website is here --> http://www.foodnetwork.com/recipes/key-lime-cupcakes-with-key-lime-curd-recipe/index.html

The thing that I feel the need to tell you about this is that it is REALLY butter heavy, and the frosting is INSANELY sweet. It is possibly too much sugar to really eat more than one. 


They were also a little mealy, and I am not sure if that was something I did or the recipe.  However, they were quite tasty in small doses.


Tuesday, July 24, 2012

Miranda Tate inspired hair

Hello again my lovelies! I just went to see the new Batman movie last night, and was completely amazed at how wonderful it was! For those of you that haven't seen it, I suggest it just for the huge amount of special effects that were used so well! I especially liked the hairstyles that Miranda Tate and Selina (Catwoman) had. Today's hairstyle is inspired by Miranda Tate's braid that she wore in the end of the movie. 

To achieve this look all you need is a comb and a few hair elastics.  First thing that you need to do is the same as always, and comb out your hair to remove any tangles. Once smooth you are going to take your comb and brush it all straight back from your face. If you want to go closer to the actual hairstyle from the movie you will do a deep part in the front of your hair. If you have bangs you will utilize them by using them as the only thing that is parted, otherwise part deeply and take it about two inches back and then pull the rest of your hair straight back.

However, today I just pulled it all back. Then separate out hair straight back from your temples that are about 1 inch thick and place in a hair elastic in the back of your head.  Then you are going to make a small hole right above the hair tie and flip the hair in the pony tail through the hole. Then you are going to take the hair and gather it all together, then separate into three pieces and braid down about 2/3 of the way. Tie off the hair and leave the end loose. Pull loose strands out from braid around your face to soften the look for everyday wear.

Front View

Side View

Back view

Let me know if you have any questions or comments about this hairstyle, or the one that was used in the movie!

<3

Saturday, July 21, 2012

Workout hair

Hello my lovelies! I am currently getting ready for the color run tomorrow. If you don't know what that is a link to look at it is right here --> http://www.youtube.com/watch?v=ZWsfHC-0d6A This is one of many videos of this really cool run, and I get to do it tomorrow! I am so excited! Anyway, as part of the getting ready process I have come up with a simple and cute hairstyle for the 5k. 


The first thing you need is hair ties and a comb (preferably rat tail) and bobby pins if you so desire. 


First thing first, as always, comb out your hair till smooth.  Once smoothed out you are going to comb it back out of your face and section the hair from the arch of one eye brow back to the back of your ear in a diagonal line. Do this to both sides from the eye brow so you have two pieces at the front of your head that are shaped like triangles. Tie the rest of your hair back for now to keep it out of the way. 
Top/front view
Take the tip of each triangle and twist, incorporate more hair as you continue twisting all the way down the hair, leading back to the top of your head. Then tie off.

Side View
Then take your hair and the twists and twist them tightly into a ballerina bun. Tie it off with a hair tie.
Back view
This is when you may want to fix the strays and bumps with bobby pins, but since I am just going to go for a run, it doesn't matter so much to me.

And that is it! Let me know if you try this out, or have questions or comments.

<3

There will be braids

Hey all!  Here's another hair style that I came up with. And knowing me, you know that there will be braids! :D


Ok, so you need a rat tail comb, small elastic hair ties, a hair tie, and bobby pins.


So, first thing first, just comb out your hair. Once it is smooth, comb it straight back and make a deep part leading from the arch of your eye brow back.  Then you are going to take a section about 3 inches back. Secure this for the moment, and pull the rest of your hair back into a high pony tail.


Then take the hair at the front and separate out a third and do a lace dutch braid all the way down. This means that you are braiding the outside pieces under and only adding hair on one side of the braid as you go. Braid this pulling it back towards the pony tail and secure when you reach the end of the hair. Separate out another third and repeat, and then do the same to the last section of hair.  
From the top
Once the front is braided you are going to separate the hair in the pony tail into fourths and braid each piece of hair all the way to the bottom. Once it is all braided you are going to do the tricky part and braid all four together in a four-stranded braid.  So, take the braid on one side and weave it under, over and under. Repeat with the next strand on the same side as the first. Keep going until the hair is at the end and secure. Then roll the hair up into a bun, and pin into place.
Hair from the back
Then you take the three front braids and braid back towards the bun that you just made. Braid all the way to the end and secure. Then wrap around the hair tie to hide it, and pin it back into place.  
Hair from the side
Voila! Elegant hair for a dinner out, date, or wedding.


Just let me know if you have any questions or need anything explained differently.


<3


Flower braid

Hello again! I am back with a new hairstyle for you to try out! It's super simple and great for a casual outing!  For this you will need a rat tail comb, bobby pins, and a hair tie.


First thing, take your hair and comb out all the tangles. When it is all smoothed out you need to take your rat tail comb and make a deep part from the arch of your eye brow back.  From that part separate a chunk of hair about 2 inches back from your hair line straight over. Pin this out of the way.


Take the rest of your hair and gather it at the back of your head. In this instance I used a hair tie and just made a messy bun, you could also make a pony tail. If you want something that looks a little sleeker, take your hair and twist it until it wraps around into a ballerina bun.
Hair from the front
Once your hair is back in a bun (or a pony tail) take the hair that you separated out and separate it into 2 pieces. Pin one of them out of the way, and braid the first one into a french or a dutch braid for a couple inches past the ear and secure at the end. Repeat with the second piece of hair. 
Hair from the side
Combine the hair and braid all the way down to the end, secure. Tug on the outside pieces of the braid to make it more voluminous and start rolling the braid into a roll from the bottom. Pin the roll onto your head with the bobby pins.

That's it! A little flower head band braid!  

Let me know if you have any comments or questions!

<3

Tuesday, July 17, 2012

Braided Mohawk Pony-tail

Hello again my lovelies! I am so sorry for it taking a while to post again, but it's been a CRAZY week at school. This week I have a hair style for you that is leaning a little on the edgy side of things.  Let's get started!

You need to a comb and a hair tie (maybe a few bobby pins to pin back stray hairs and fix bumps.) 

The first thing that you want to do is just comb out your hair to make sure that you don't have any tangles that will get in the way when you are braiding.  Once it is all smooth, comb it to the back of your head.

When pushed back you are going to want to section off your hair on the top of your head. I went from the arch of each eyebrow back.  Take that hair and keep it out, tie back the rest of your hair to keep it out of the way while you braid. 

Take the hair on the top of your head and start dutch braiding at the very front. Slowly pull in the hair from the section that you made earlier, trying to keep the braid going down the middle of your head.  

When you reach the end of the hair in the section, continue to braid for 2-4 more inches.  Tie it off if you have slippery hair and then gather up all of your hair into a high pony tail and tie off. 

This is when you are going to take bobby pins and pin back strays and any bumps that may be in you hair. 

Just as a disclaimer, I took the pictures late in the day and my hair slowly fell out of the bobby pins due to the layers. 

Top View of Braided Mohawk Pony


Side View of Braided Mohawk Pony


As usual, ask any questions that you may have!


                                                                  <3 <3 <3

Sunday, July 8, 2012

Loopy cage braid

This weeks hairstyle is a loopy looking cage braid. This is accomplished through the use of a brush/comb, bobby pins, and 2 hair elastics.

View from the back of the rib cage braid


The first thing that you do is brush out all of your hair and gather up all of your hair into a high ponytail on your head. Secure with an elastic.
Side view of the rib cage braid
Then you are going to start a french braid on the top of your ponytail. Instead of trying to pull the braid tight across, pull the strand down. Do this all the way down your head, the pieces you bring in will get longer, but this is good. Secure the braid at the bottom of your head with the second hair elastic.
Top view of the rib cage braid.
The last major step is to pick a strand of the braid that is about an inch down the braid and pull up over the first elastic holder. Pin the hair securely in place. Now, if this happened correctly, the loops of hair on the sides should loop outward, creating a rib cage type effect. If you want to add a headband or flower to jazz up the look, that is super cute. The other thing that you could do, as I did, is to take the end of the braid and pin it up under your hair and to the top of your head. This will enhance the rib cage look.                                                                                                                                                       <3